An integration guide for a customer's IT team that uses Okta as its identity provider and wants to sign in to Swopi Teams using the SAML 2.0 standard.
Note. Swopi's default enterprise SSO is OpenID Connect (OIDC), a modern protocol on top of OAuth 2.0 (see SSO via Microsoft Entra ID (OIDC) and Azure / Entra SAML). We deploy Okta SAML 2.0 on request. The steps below walk you through creating the SAML app in Okta; our team completes the final connection (last step).
#Overview
Okta SAML 2.0 lets a company centralize authentication, employees sign in to Swopi Teams with their company Okta credentials. The benefit is straightforward:
- one set of credentials for every company app,
- security, authentication stays entirely on Okta's side (MFA, conditional access, and device management are inherited by Swopi automatically),
- streamlined onboarding and offboarding: IT controls access from one place.
#Prerequisites
- An Okta admin account with permission to create apps.
- A Swopi Teams account with the admin role.
#Setting up the Okta SAML app, step by step
#Step 1: Create the app
In the Okta Admin Console, go to Applications → Applications and click Create App Integration. Choose SAML 2.0 as the sign-in method and click Next.
#Step 2: General Settings
In the General Settings step, set the App name to Swopi. Click Next.
Uploading a logo is optional, you don't need to upload the Swopi icon. Okta uses a default icon and it has no effect on SSO.
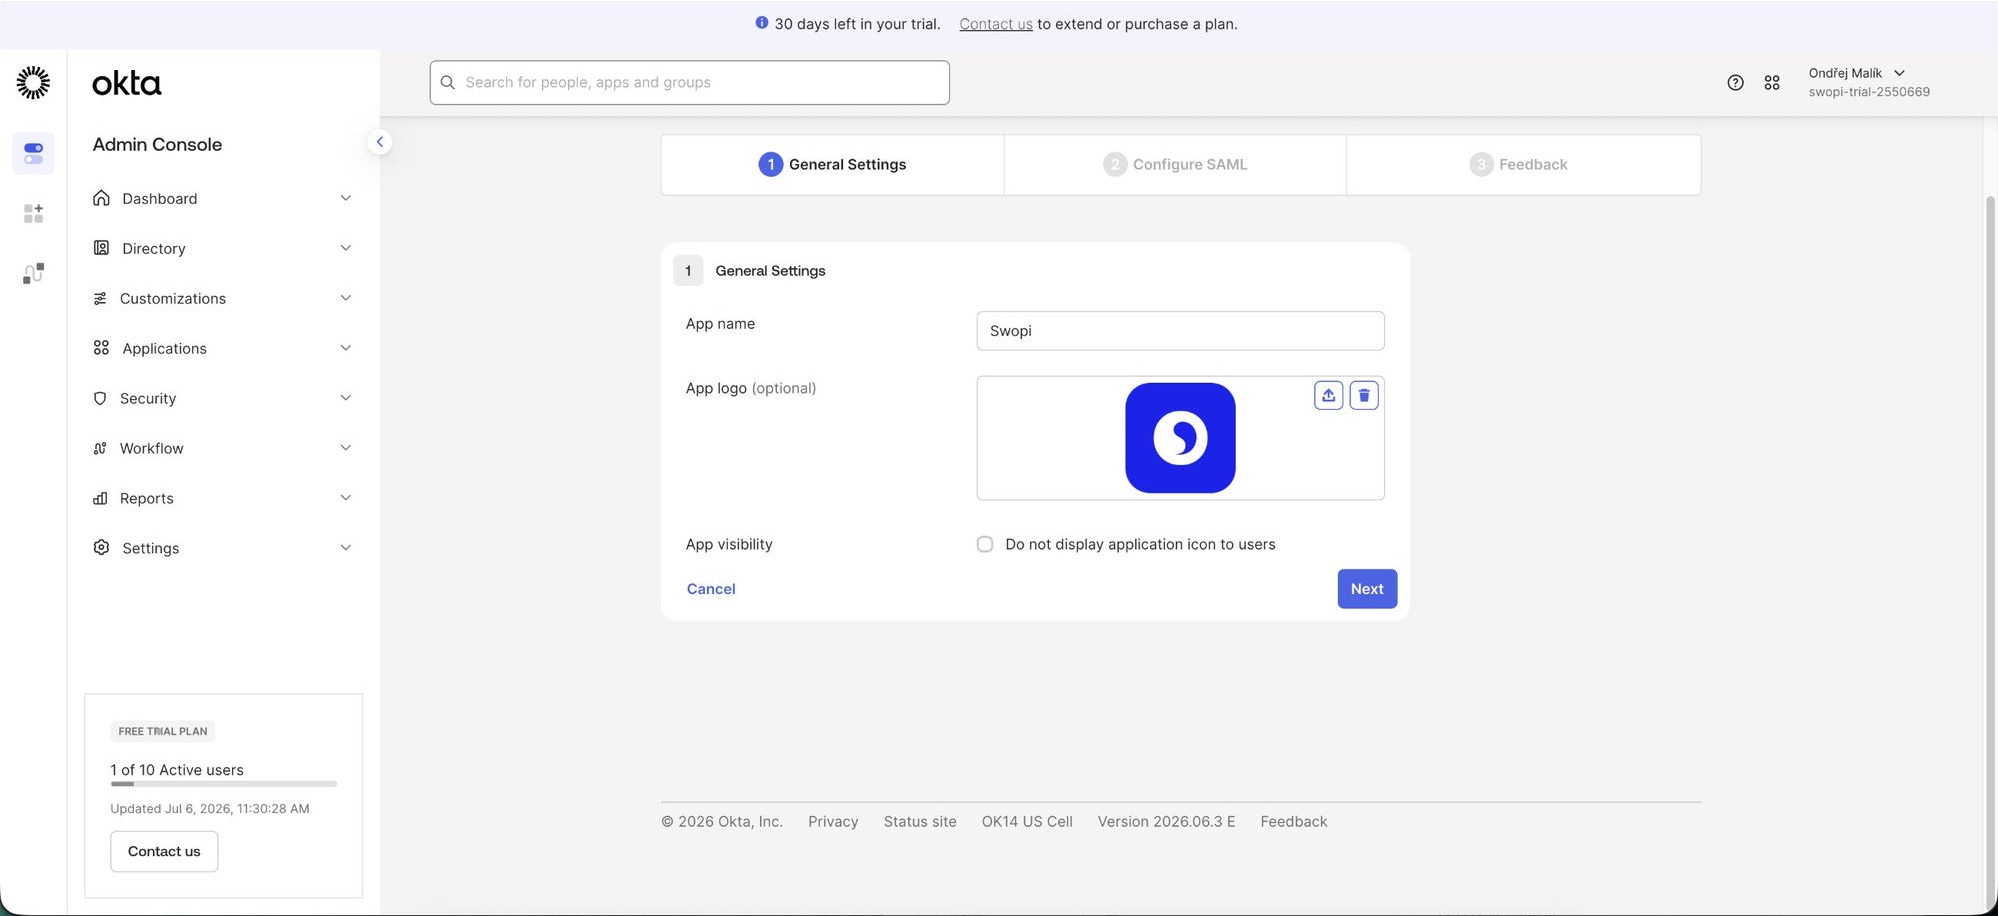
General Settings: App name = Swopi (the logo is optional).
#Step 3: Configure SAML
In the Configure SAML step, enter exactly these Swopi values. Use the Copy button on each value and paste it into the matching field in Okta.
Single sign-on URL
https://swopi-prod.firebaseapp.com/__/auth/handler
Keep Use this for Recipient URL and Destination URL checked.
Audience URI (SP Entity ID)
https://swopi-prod.firebaseapp.com
Default RelayState, leave blank.
Name ID format
EmailAddress
Application username
Okta username
Update application username on
Create and update
Double-check the exact form of both URLs (they are case-sensitive) and click Next.
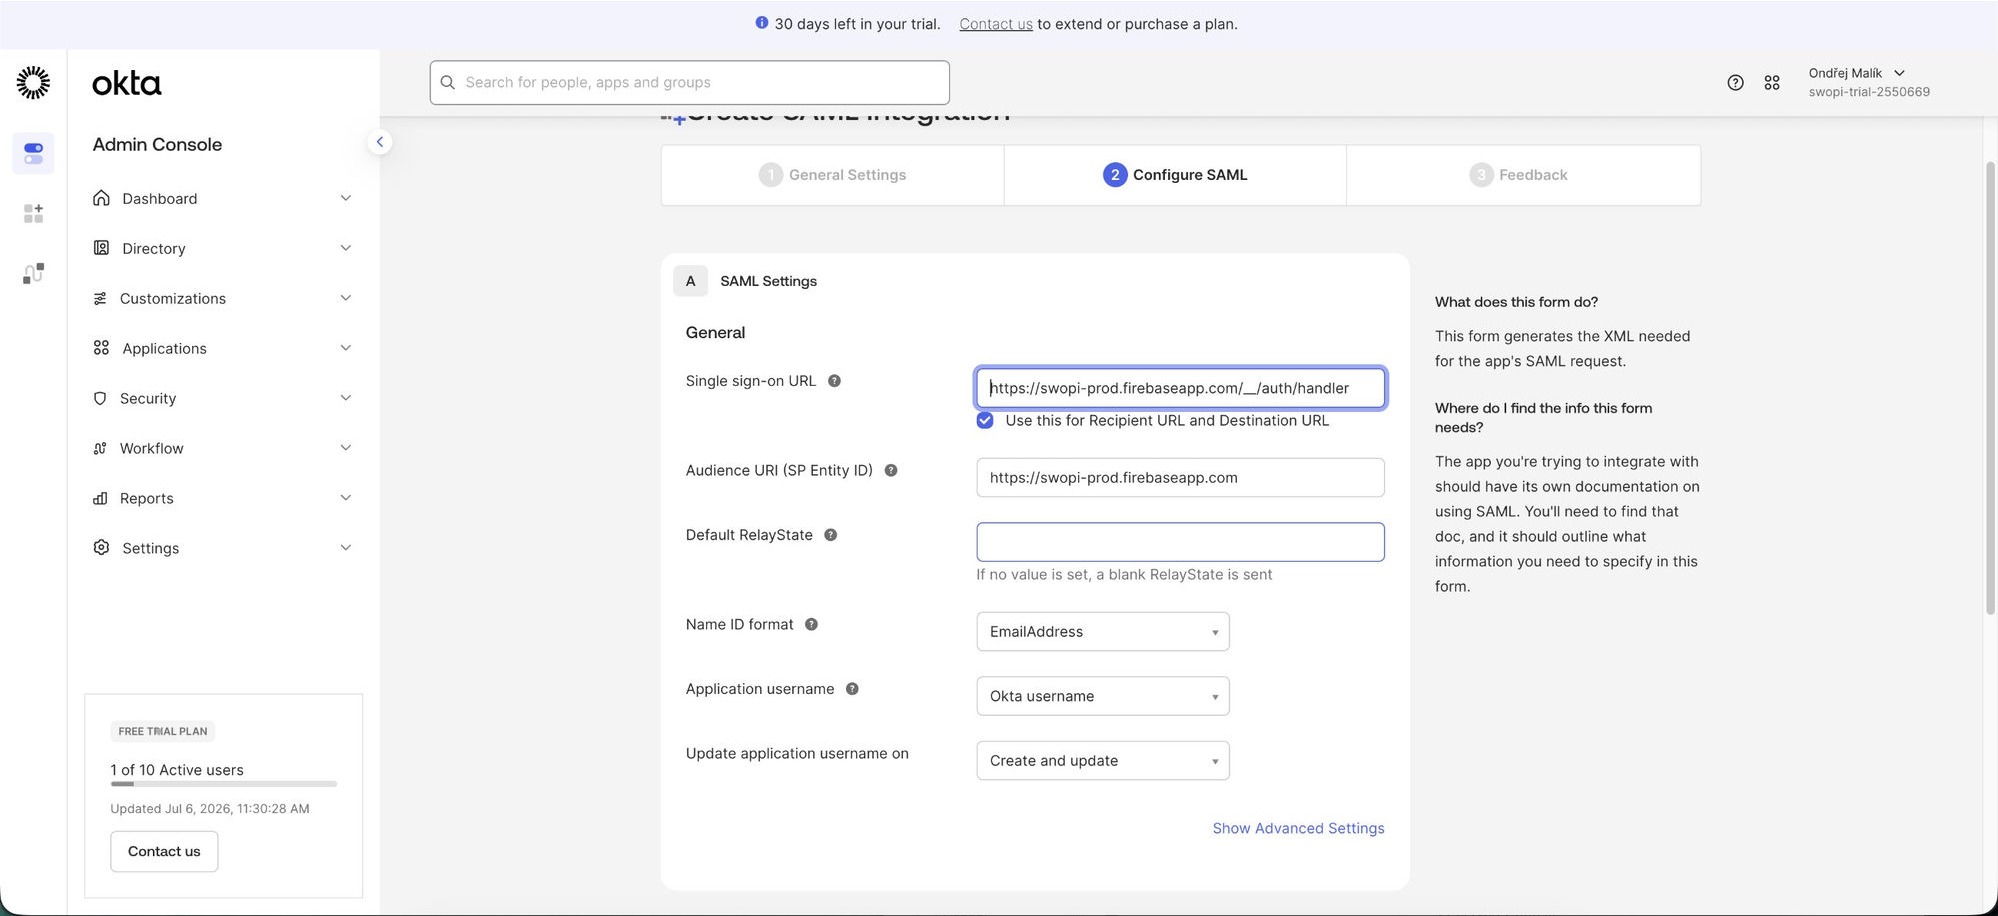
Configure SAML, the Swopi values filled in. This is the most important step; verify the exact form of the Single sign-on URL and Audience URI.
#Step 4: Feedback
On the Feedback tab, for "Are you a customer or partner?", select "I'm an Okta customer adding an internal app".
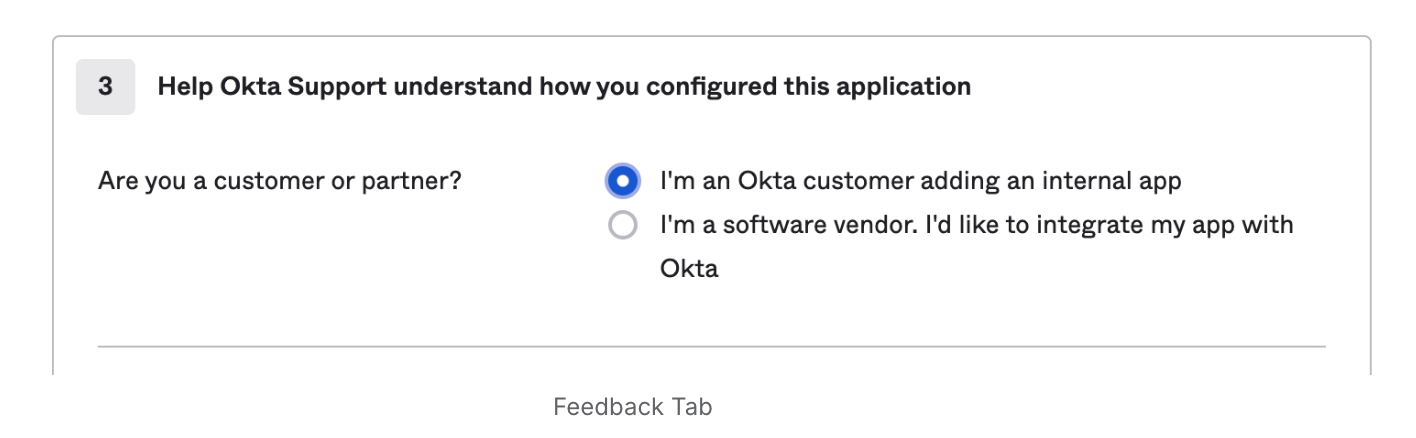
Feedback, select "I'm an Okta customer adding an internal app".
Important. If you see a pane with the "App type" and "Contact app vendor" checkboxes, leave both unchecked.
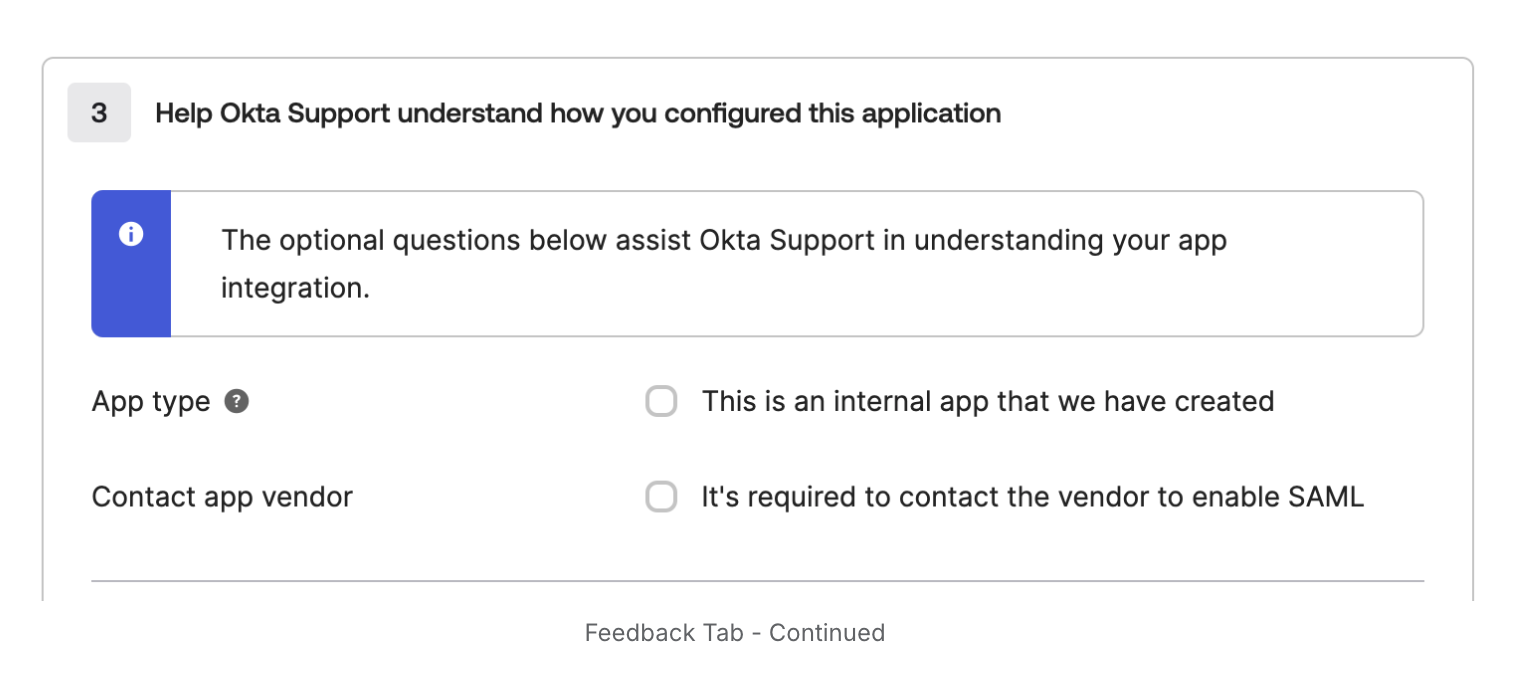
Feedback (continued), leave both "App type" and "Contact app vendor" unchecked.
Click Finish.
#Step 5: Assign users
On the new Swopi app, open the Assignments tab and assign the people or groups who should sign in to Swopi via Okta, either individually (Assign to People) or by group (Assign to Groups).
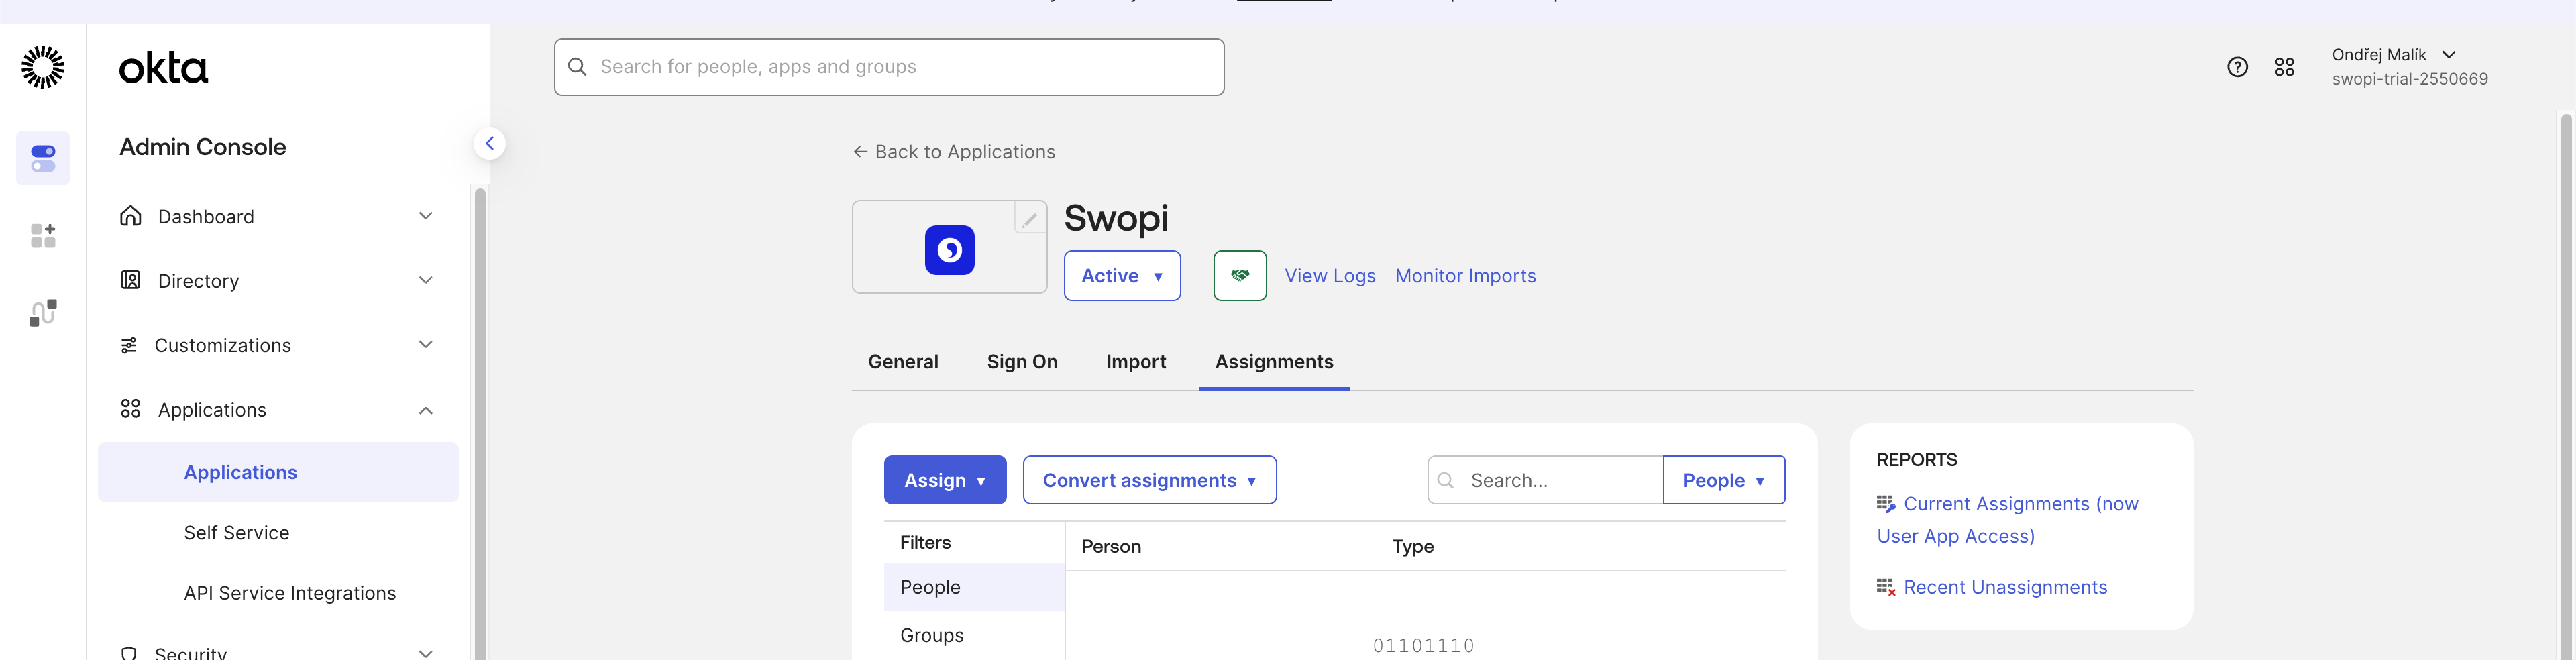
Assignments, assign the people or groups who should sign in to Swopi via Okta.
Note. Assigning users in Okta does not by itself create Swopi cards. To auto-create members, use member import: Microsoft Entra ID LiveSync™ or Google Workspace. Okta SAML handles sign-in; member import handles account and card creation.
#Step 6: Send us your metadata (final step)
Open the app's Sign On tab, copy the Metadata URL, and email it to support@swopi.co. Our team completes the SAML setup for your domain and confirms once it's live.
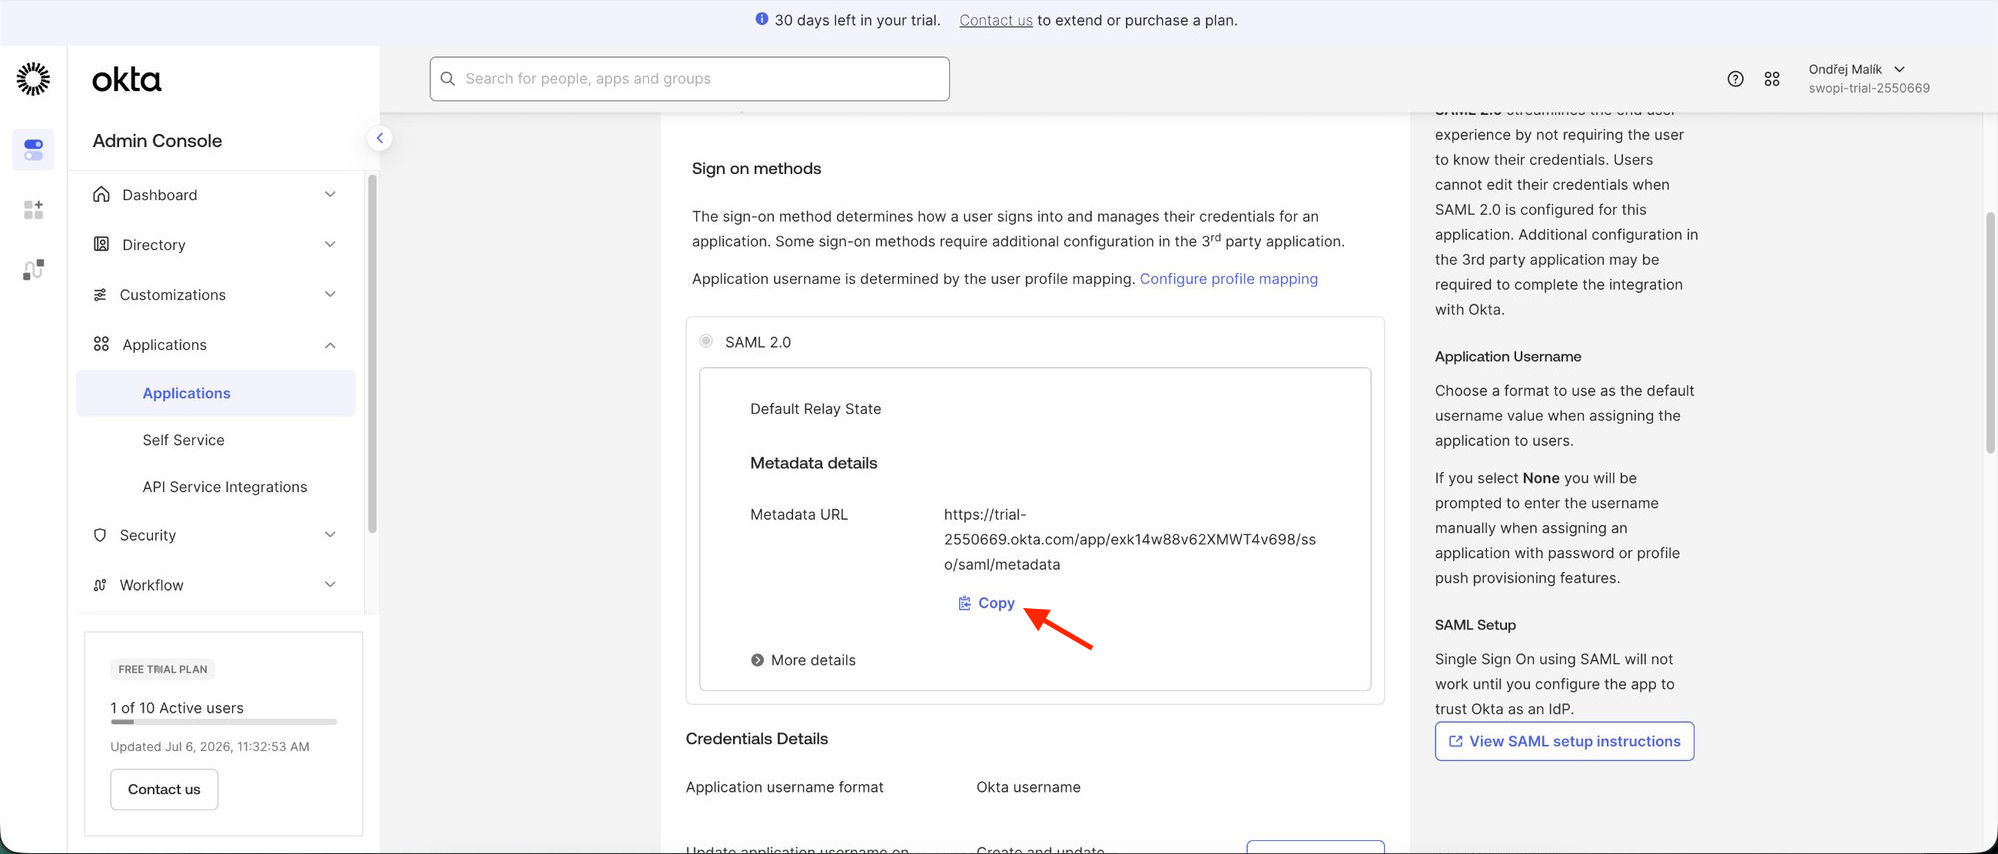
Sign On, copy your Metadata URL and send it to support@swopi.co. Swopi completes the connection.
#Logging in with Okta SAML (desktop)
Once setup is complete, two sign-in flows work:
- From Okta (IdP-initiated). The user clicks the Swopi tile in Okta
My Apps and is redirected to
dash.swopi.coalready signed in. - From Swopi (SP-initiated). The user opens dash.swopi.co and chooses "Continue with SSO".
If "Continue with SSO" tells the user to use another method, the domain's SAML config isn't finished yet in Swopi, see the final step (send the Metadata URL to support@swopi.co).
#Logging in on mobile
- From Okta (IdP-initiated). The Swopi tile in the Okta My Apps app
opens the signed-in user on
dash.swopi.co. - From Swopi (SP-initiated). On
dash.swopi.coor in the Swopi app, choose "Continue with SSO".
#Troubleshooting
| Symptom | Cause and fix |
|---|---|
| "Continue with SSO" says to use another method | The domain's SAML config isn't finished yet in Swopi. Copy the Metadata URL (Sign On tab) and send it to support@swopi.co. |
| Where do I get the Metadata URL? | In the Swopi app in Okta → Sign On tab → Metadata URL (Copy button). |
| Sign-in fails with an ACS / audience mismatch | Check the exact form of the Single sign-on URL (…/__/auth/handler) and Audience URI (https://swopi-prod.firebaseapp.com, case-sensitive). |
| The user is not assigned in Okta | Assign them to the Swopi app on the Assignments tab (individually or by group). |
| The user signs in but has no card | Assignment in Okta does not create cards, use a member-import integration (Entra ID LiveSync™ or Google Workspace). |
Integration contact: support@swopi.co